With all the madness currently going in the API world with GraphQL, you might be wondering how to migrate your existing REST APIs to GraphQL without breaking anything. This guide will help you accomplish your REST to GraphQL mission without changing your codebase so that you can REST with GraphQL! (pun intended 🤭)
REST to GraphQL
Well, GraphQL advocates have done a great job in marketing GraphQL already. Respecting their efforts, I won’t be going into details, but provide a summary:
- GraphQL allows you to fetch multiple resources in a single request.
- GraphQL solves the over fetching problem of REST by letting you describe your exact data needs.
- GraphQL helps you solve the N+1 query problem on frontend by fetching related data in a single query.
What I will be touching upon in this guide instead is the aspect that most people miss while advocating GraphQL, which is, “We have already invested heavily in REST”. This means:
- Most of our existing services are in REST.
- We are more comfortable writing REST services.
- We want to support existing clients using REST APIs.
While many articles help you migrate from REST to GraphQL, they all force you to change your existing codebase or write a new one in front of your REST services.
But wait…
If it works, then don’t touch it.
Wasn’t this the first rule of programming?
Migrations can be painful, especially the magnitude of a huge codebase can be daunting. There is always a chance of breaking something.
Why can’t we just REST?
Let’s face the fact - We all are lazy by nature. We love simple hacks and easy solutions.
What if there was a way wherein you could keep your REST services as is and still get a GraphQL layer on top of it without writing any code whatsoever? Sounds like a magic right? Well, Space Cloud helps make this possible.
What is Space Cloud?
To keep things simple,
Space Cloud is an open-source platform to build, secure and scale your apps. It provides instant GraphQL and REST APIs on your database and microservices.
The coolest part about Space Cloud is that all the APIs are realtime. You can optionally subscribe to changes in the database. This functionality comes in handy while making real-time apps.
It also has a deployments module that deploys and autoscales your services on Docker/Kubernetes.
However, in this guide, our focus will be on Space Cloud’s remote service module to migrate your REST services to GraphQL.
Like it already? Show your support ❤️ by giving us a star on Github.
The architecture
This is what the final architecture of GraphQL over REST looks like:
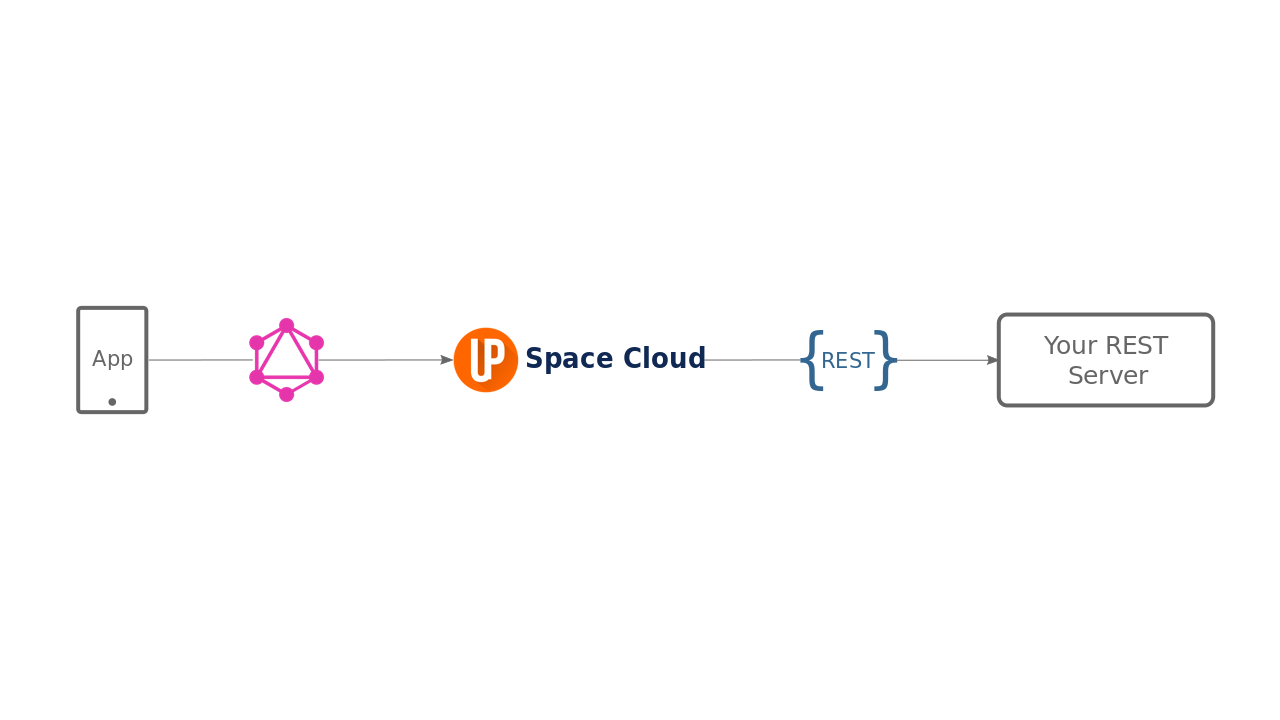
Your apps make a GraphQL query to Space Cloud, which in turn hits a REST endpoint on your server. Space Cloud acts as a GraphQL proxy or API gateway in this case.
As you would have noticed, Space Cloud is a separate GraphQL layer that sits on top of your REST services. The beauty of this fact is that your REST services are still intact, and you can use them directly in your existing clients. This fact lets you ship your REST service to GraphQL without breaking your older clients.
Great! We have understood what Space Cloud is and how it sits with our application. Let’s get straight to some action!
What we will be doing
In this guide, we will be building a simple REST service which has the following endpoints:
- Adder endpoint:
POST/adder - Doubler endpoint:
GET/doubler/:num
The adder endpoint will return the sum of two numbers that it receives in request body. The doubler endpoint, on the other hand, will return double of the number that it receives in URL path parameter.
First we will access the above endpoints via REST. Thereafter, we will simply use Space Cloud’s remote services module to access these endpoints via GraphQL.
Great! Let’s start building things now!
Note: Don’t worry if you get stuck somewhere. You can always ping me on this Discord server, and I will help you out personally.
Step 1: Writing a service
Note: Even if you are reading this from your mobile right now, you can still follow this guide along just by reading.
Let’s start by writing our REST service. We are going to write our REST service in NodeJS using Express.
Note: You can write your service in any language or framework as long as it can speak HTTP since that’s the protocol Space Cloud is going to use to communicate with your REST service.
First, create a folder that serves as our working directory.
Create NPM project:
npm init -yInstall Express:
npm install --save expressWrite express server
Create a file index.js and copy paste the following code:
var express = require("express");
var app = express();

app.use(express.json());

app.post("/adder", function(req, res) {
  const num1 = req.body.num1;
  const num2 = req.body.num2;
  const response = { value: num1 + num2 };
  res.status(200).send(JSON.stringify(response));
});

app.get("/doubler/:num", function(req, res) {
  const num = Number(req.params.num);
  const response = { value: num * 2 };
  res.status(200).send(JSON.stringify(response));
});

var server = app.listen(8080, function () {
    console.log("app running on port:", server.address().port);
});
As you can see, the code is pretty straight forward. We have just created an HTTP server using ExpressJS that is listening on port 8080.
The server has two endpoints, as we discussed earlier:
- Adder endpoint: We are expecting to receive two numbers -
num1andnum2in the request body. All we are doing is returning the sum of these two numbers. - Doubler endpoint: We are simply returning the double of the number that we are receiving in the URL path parameter.
That’s all we need to write for this service.
Note: For migrating your existing REST services, you don’t need to write/modify any code. And if your service is already running, you can even skip the 4th step.
Step 2: Install Space Cloud
We are using space-cli to run Space Cloud for us.
Download space-cli
space-cli is the cli tool for Space Cloud. You can download a version for your particular platform:
Unzip the compressed archive.
For Linux / Mac: unzip space-cli.zip && chmod +x space-cli
For Windows: Right-click on the archive and select extract here.
Copy the space-cli binary to your environment path variable for global usage.
For Linux / Mac: Copy the space-cli to /usr/local/bin. You may have to use sudo depending on the permissions of your /usr/local/bin.
For Windows: Add the path of the space-cli.exe to the environment variable PATH for making space-cli accessible globally.
To make sure if the space-cli binary is installed correctly, type the following command:
For Linux / Mac: space-cli --version
For Windows: space-cli.exe --version
This prints the space-cli version.
Run Space Cloud
We can set up all Space Cloud components (gateway and runner) via space-cli using a single command.
space-cli setup --devThe setup command selects Docker as a target by default and runs all the containers required to setup Space Cloud. On successful installation it generates an output similar to this one:
INFO[0000] Setting up Space Cloud on docker.
INFO[0000] Fetching latest Space Cloud Version
INFO[0000] Starting container space-cloud-gateway...
INFO[0000] Image spaceuptech/gateway:latest already exists. No need to pull it again
INFO[0000] Starting container space-cloud-runner...
INFO[0000] Image spaceuptech/runner:latest already exists. No need to pull it again

INFO[0001] Space Cloud (id: "local-admin") has been successfully setup! 👍
INFO[0001] You can visit mission control at http://localhost:4122/mission-control 💻
INFO[0001] Your login credentials: [username: "local-admin"; key: "KkYr6FvgYsvr"] 🤫
Verify Space Cloud installation
Verify the installation by running the following docker command:
docker psYou should see an output similar to this:
CONTAINER ID        IMAGE                        COMMAND             CREATED              STATUS              PORTS                                            NAMES
507ce4042486        spaceuptech/runner:latest    "./app start"       About a minute ago   Up About a minute                                                    space-cloud-runner
33a5a7a9be3a        spaceuptech/gateway:latest   "./app run"         About a minute ago   Up About a minute   0.0.0.0:4122->4122/tcp, 0.0.0.0:4126->4126/tcp   space-cloud-gateway
Step 3: Configure Space Cloud
If you exec into docker container of Space Cloud’s gateway, you can see a config.yaml file generated by gateway in the /app directory.
Space Cloud needs this config file to function. The config file is used to load various information like which databases to use, their connection strings and security rules.
Space Cloud has it’s own Mission Control (admin UI) to configure all of this quickly.
Open Mission Control:
Head over to http://localhost:4122/mission-control to open Mission Control.
Note: Replace
localhostwith the address of your Space Cloud if you are not running it locally.
Create a project:
Click on Create a Project button to open the following screen:
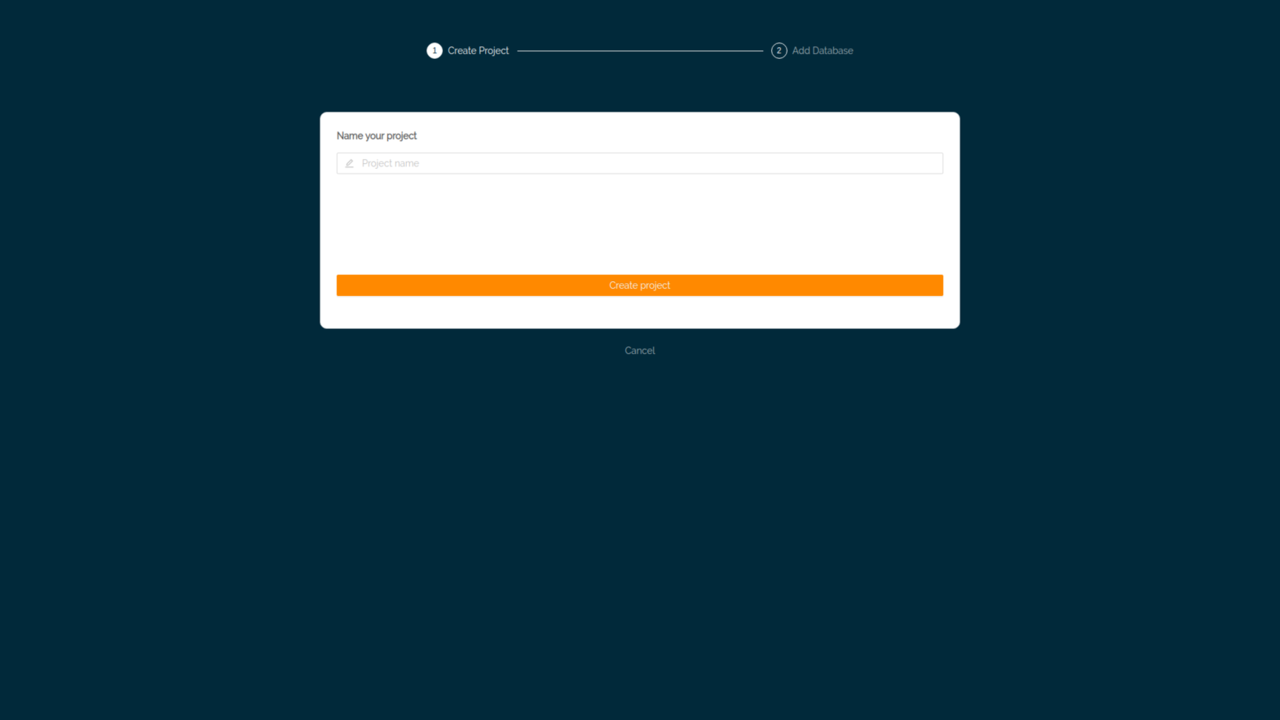
Name your project as MyProject.
Hit Create Project button to create the project.
After creating the project, the next step would be adding a database to your project:
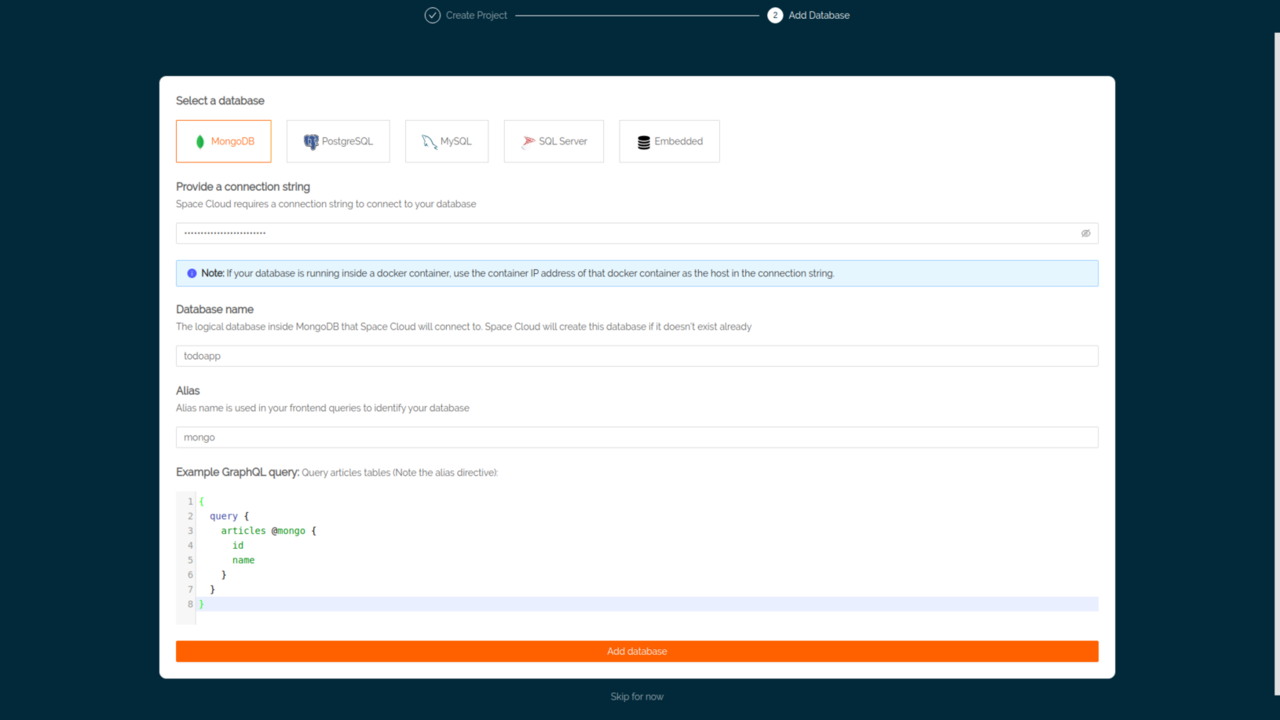
However, we can simply skip this step as we don’t need a database for this project.
After that you would be directed to the overview page of your project:
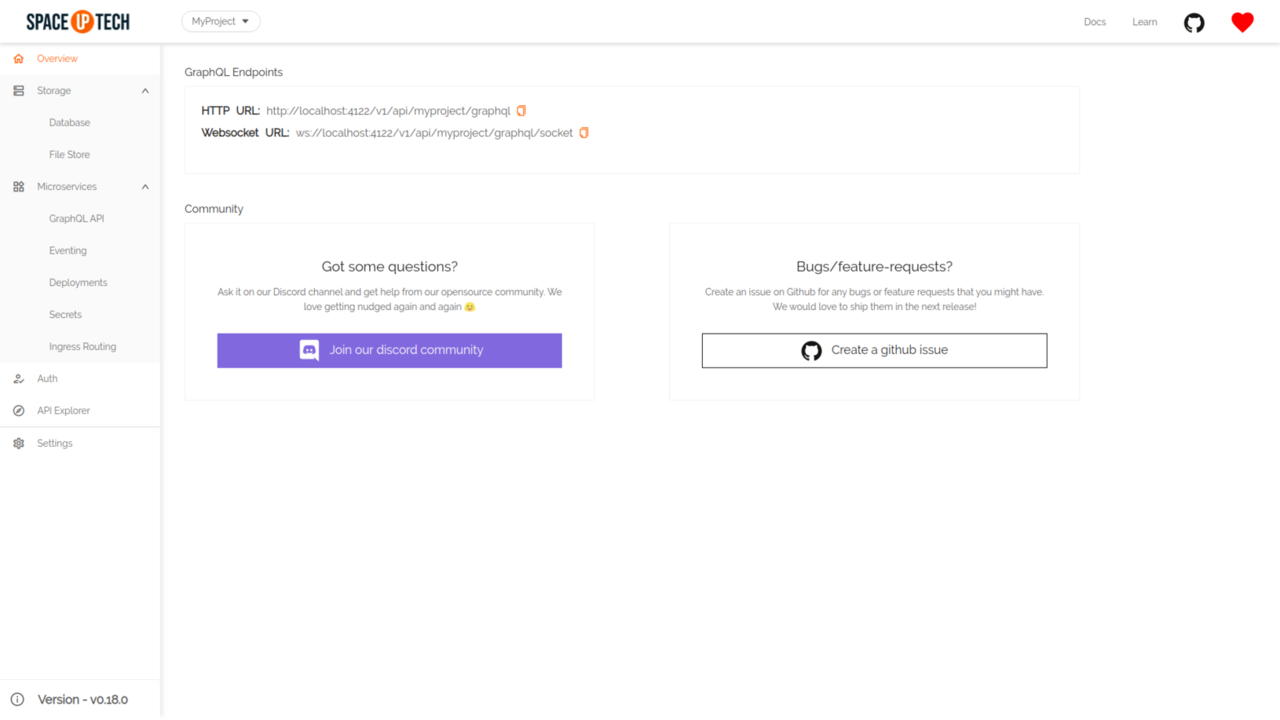
That’s all we need to configure as of now.
Step 4: Deploying the REST service
You can skip this step if you already have a REST service deployed.
Space Cloud can deploy only docker containers as of now. So we need to dockerize our app. We are going to take the help of space-cli to do that.
First of all, we need a docker registry that can host the docker images of our service. Run this command to spin up a docker registry locally:
space-cli --project myproject add registryIn production, it is recommended to use a managed container registry
Now we need yo generate two files:
Dockerfile- To build the docker image.service.yaml- The service configuration (example: resources, auto-scaling, ports) to deploy this service via Space Cloud.
space-cli has a built-in command to generate both of these automatically for us. Just run the following command:
space-cli deploy --prepareIt is going to ask you a bunch of questions. Answer them with the following required values and leave the rest to default:
| Project Id | Service Id |
|---|---|
myproject |
myapp |
Great! We now have a Dockerfile and a service.yaml. Feel free to explore and change both these files before finally deploying the service. The service.yaml file looks something like this:
api: /v1/runner/{project}/services/{id}/{version}
type: service
meta:
  id: myapp
  project: myproject
  version: v1
spec:
  scale:
    replicas: 1
    minReplicas: 1
    maxReplicas: 100
    concurrency: 50
    mode: parallel
  labels: {}
  tasks:
  - id: myapp
    ports:
    - name: http
      protocol: http
      port: 8080
    resources:
      cpu: 250
      memory: 512
    docker:
      image: localhost:5000/myproject-myapp:v1
      cmd: []
      secret: ""
      imagePullPolicy: "pull-if-not-exists"
    env: {}
    secrets: []
    runtime: image
  affinity: []
  whitelists:
  - projectId: myproject
    service: '*'
  upstreams:
  - projectId: myproject
    service: '*'
The only step left now is building the docker image and deploying it via Space Cloud.
We are going to use the deploy command of space-cli for that. It first builds a docker image for us using the Dockerfile (generated in the above step) and then publishes it to the docker registry. Once it’s done publishing, it uses the config in service.yaml file to deploy the service via Space Cloud.
Enough of talking. Let’s hit the magical command now:
space-cli deployYou may have to run the above command with sudo privileges if your
dockeris not in the sudoer group.
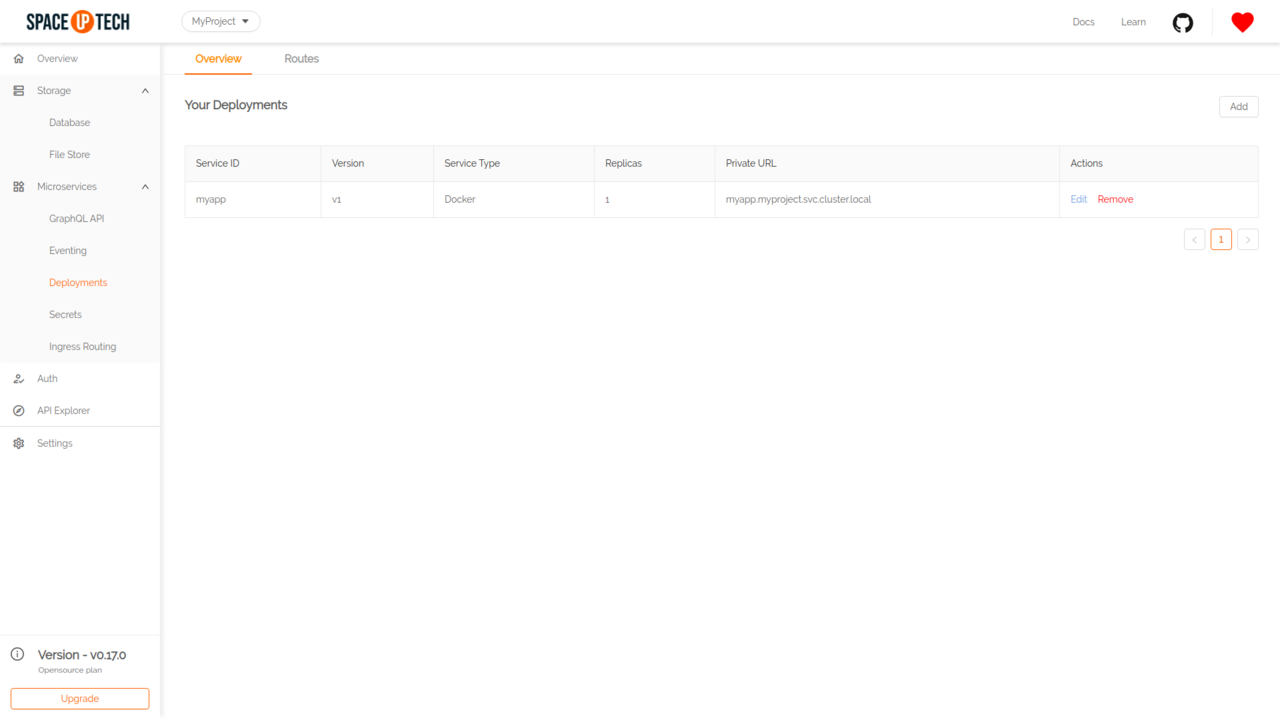
Verify the deployment
Checkout to the Overview tab of Deployments section in Mission Control and hit refresh. You should be able to see the service we just deployed like this:
Expose your service
Currently, the REST service we deployed is accessible from within the cluster only. We need to add Space Cloud Routes to expose our service to the outside world.
Let’s head over to the Ingress Routing section in the Microservices tab in Mission Control.
Hit Create your first route to open the following form:
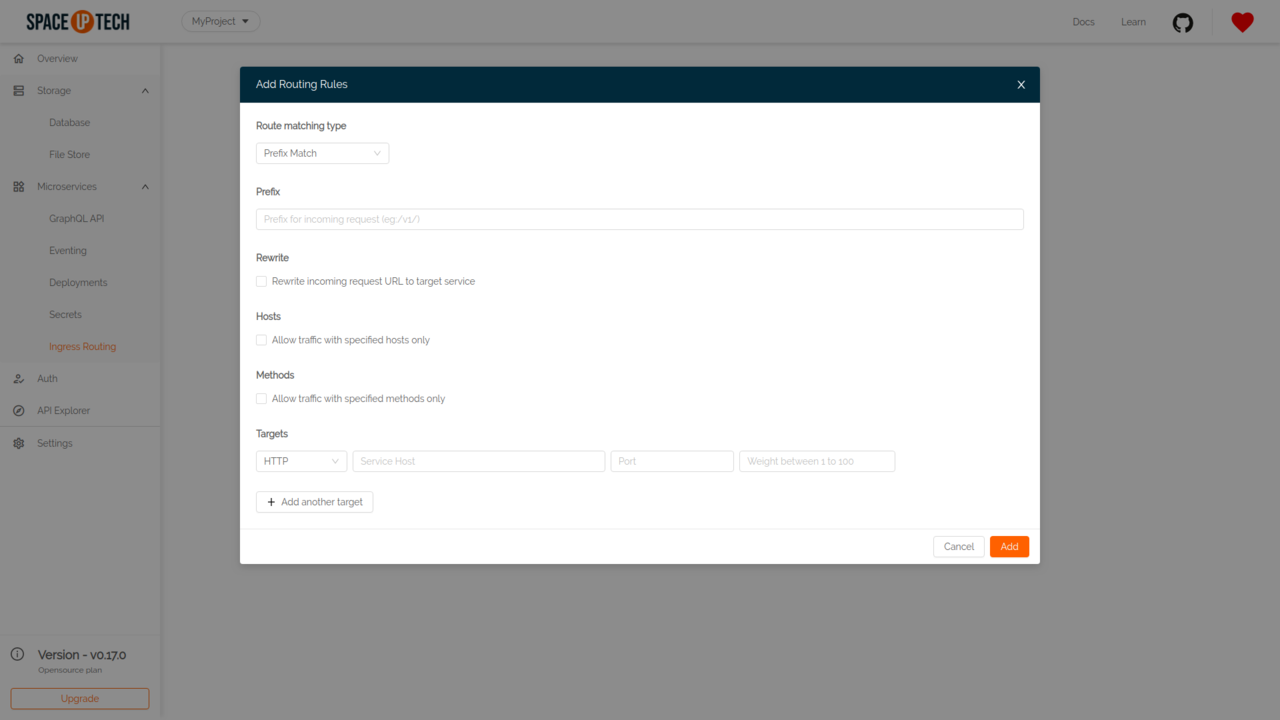
We’ll simply redirect all non Space Cloud traffic to our service for now.
You’ll need to provide the following details in the form:
| Route Matching Type | Prefix |
|---|---|
Prefix Match |
/ |
Targets:
| Scheme | Service Host | Port | Weight |
|---|---|---|---|
HTTP |
myapp.myproject.svc.cluster.local |
8080 | 100 |
Once you are done, hit Add.
To verify that our REST service is exposed, simply open another tab in your browser and enter:
http://localhost:4122/doubler/3
You should be able to see the following response on your screen:
{
  "value": 6
}
Great! We have our REST service up and running. The REST endpoints can be consumed by outside world as well. Time to expose these REST endpoints to GraphQL. (Without writing any extra code whatsoever 😛).
Step 5: Adding GraphQL to your REST endpoints
Head over to the GraphQL section under Microservices in Mission Control.
Click on the Add first remote service button.
In the form, enter the following details:
| Service Name | URL |
|---|---|
| myapp | http://myapp.myproject.svc.cluster.local:8080 |
Note:
myapp.myproject.svc.cluster.localis the domain created by space cloud for internal use. The domain format looks like this<service_id>.<project_id>.svc.cluster.local. If you have an existing REST service, provide it’s host name here.
Hit Add. This will add a GraphQL API over the service.
Unfortunately, Space Cloud cannot automatically discover our APIs. This is because of the way HTTP works in general. There is no introspection feature available for Space Cloud to follow the APIs.
To overcome this, we need to add endpoints.
Click the View action against our newly added myapp service.
This is where you add endpoints. We have two endpoints. Let’s go and add them now!
Hit the Add your first endpoint button.
Fill up the form as shown below:
| Endpoint name | Endpoint type | Method | Path |
|---|---|---|---|
| adder | Internal | POST |
/adder |
Now let’s create the next endpoint for doubling the result. Enter the following in the form:
| Endpoint name | Endpoint type | Method | Path |
|---|---|---|---|
| doubler | Internal | GET |
/doubler/{args.num} |
Notice the {args.num} in the path? This is actually referring to the parameters being passed to the GraphQL query. Don’t worry much about it for now. It will get clearer as we move forward.
Cool! That’s about it! All that left’s to do is playing around with the API we just created.
Step 6: Query your REST service via GraphQL
We have added our REST service and the two endpoints as well to Space Cloud. Time to query it using our unified GraphQL API.
Head to the Explorer section:
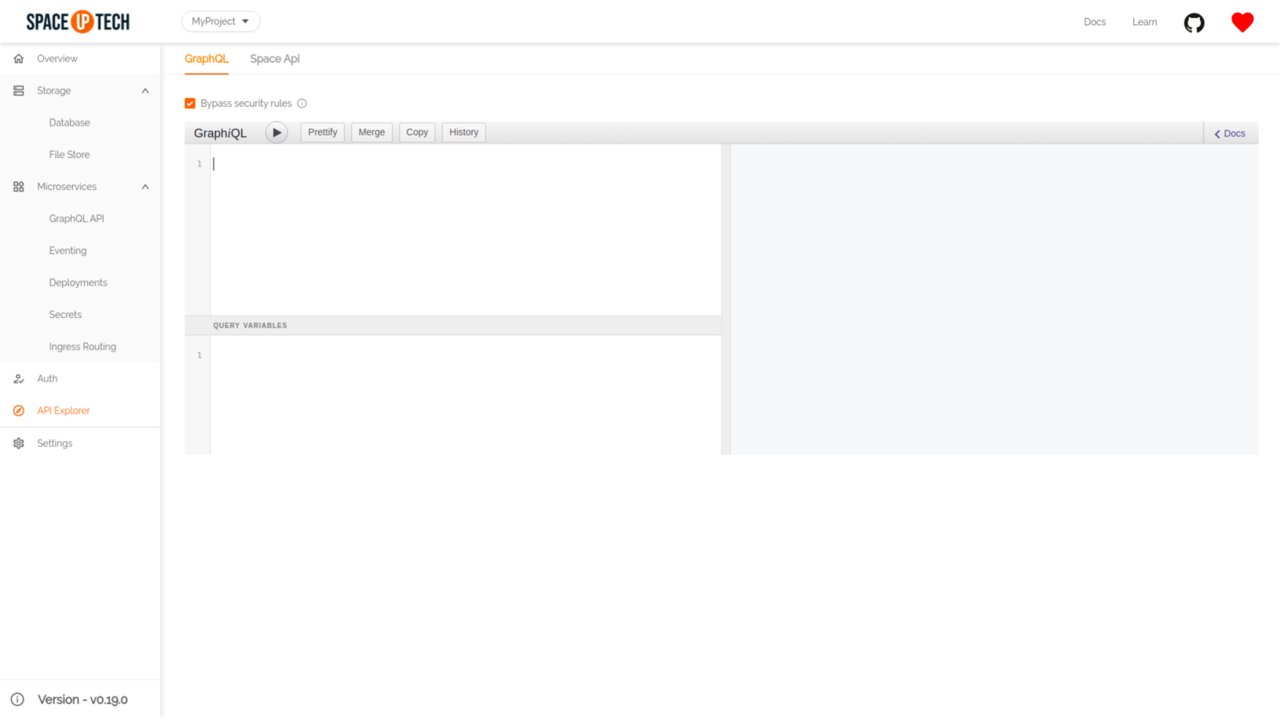
Try running the following GraphQL query in the GraphiQL explorer:
query {
  adder(num1: 10, num2: 20) @myapp {
    value
  }
}
The above GraphQL query is translated by SC to a REST call as follow:
- Method:
POST - Endpoint:
/adder - Request body:
{
  "num1": 10,
  "num2": 20
}
On successful invocation, you should be able to see a response like this:
{
  "data": {
    "adder": {
      "value": 30
    }
  }
}
Hurray! We just migrated our Rest API to GraphQL in minutes.
Now let’s understand what’s going on here.
The service name (myapp in this case) gets reflected as a directive (@myapp) in our GraphQL query. The endpoint names (adder and doubler) becomes field names.
The arguments that we passed to the adder field in the GraphQL query becomes available in the request body to the adder endpoint.
Let’s try querying the doubler endpoint with the following GraphQL query:
{
  doubler(num: 50) @myapp {
    value
  }
}
You will get a response like this:
{
  "data": {
    "doubler": {
      "value": 100
    }
  }
}
The above GraphQL query is translated by SC to a REST call as follow:
- Method:
GET - Endpoint:
/doubler/50
Remember the url we had entered for the doubler endpoint? It looked like this: /doubler/{args.num}.
The {args.num} would probably make more sense now. It was instructing Space Cloud to Generate the URL using the arguments provided in the GraphQL query. This helps you generate dynamic URLs.
Bonus - Service Chaining
Having followed this guide till here successfully, we all deserve a well-earned bonus! Let’s see how this REST to GraphQL transition unlocks a super awesome power, Service Chaining, for us.
Let’s take a scenario where:
- We want to sum two numbers using the adder service.
- Double the result we got from the adder service.
The REST way
If we were using REST in our client-side code, the above task would have looked like this:
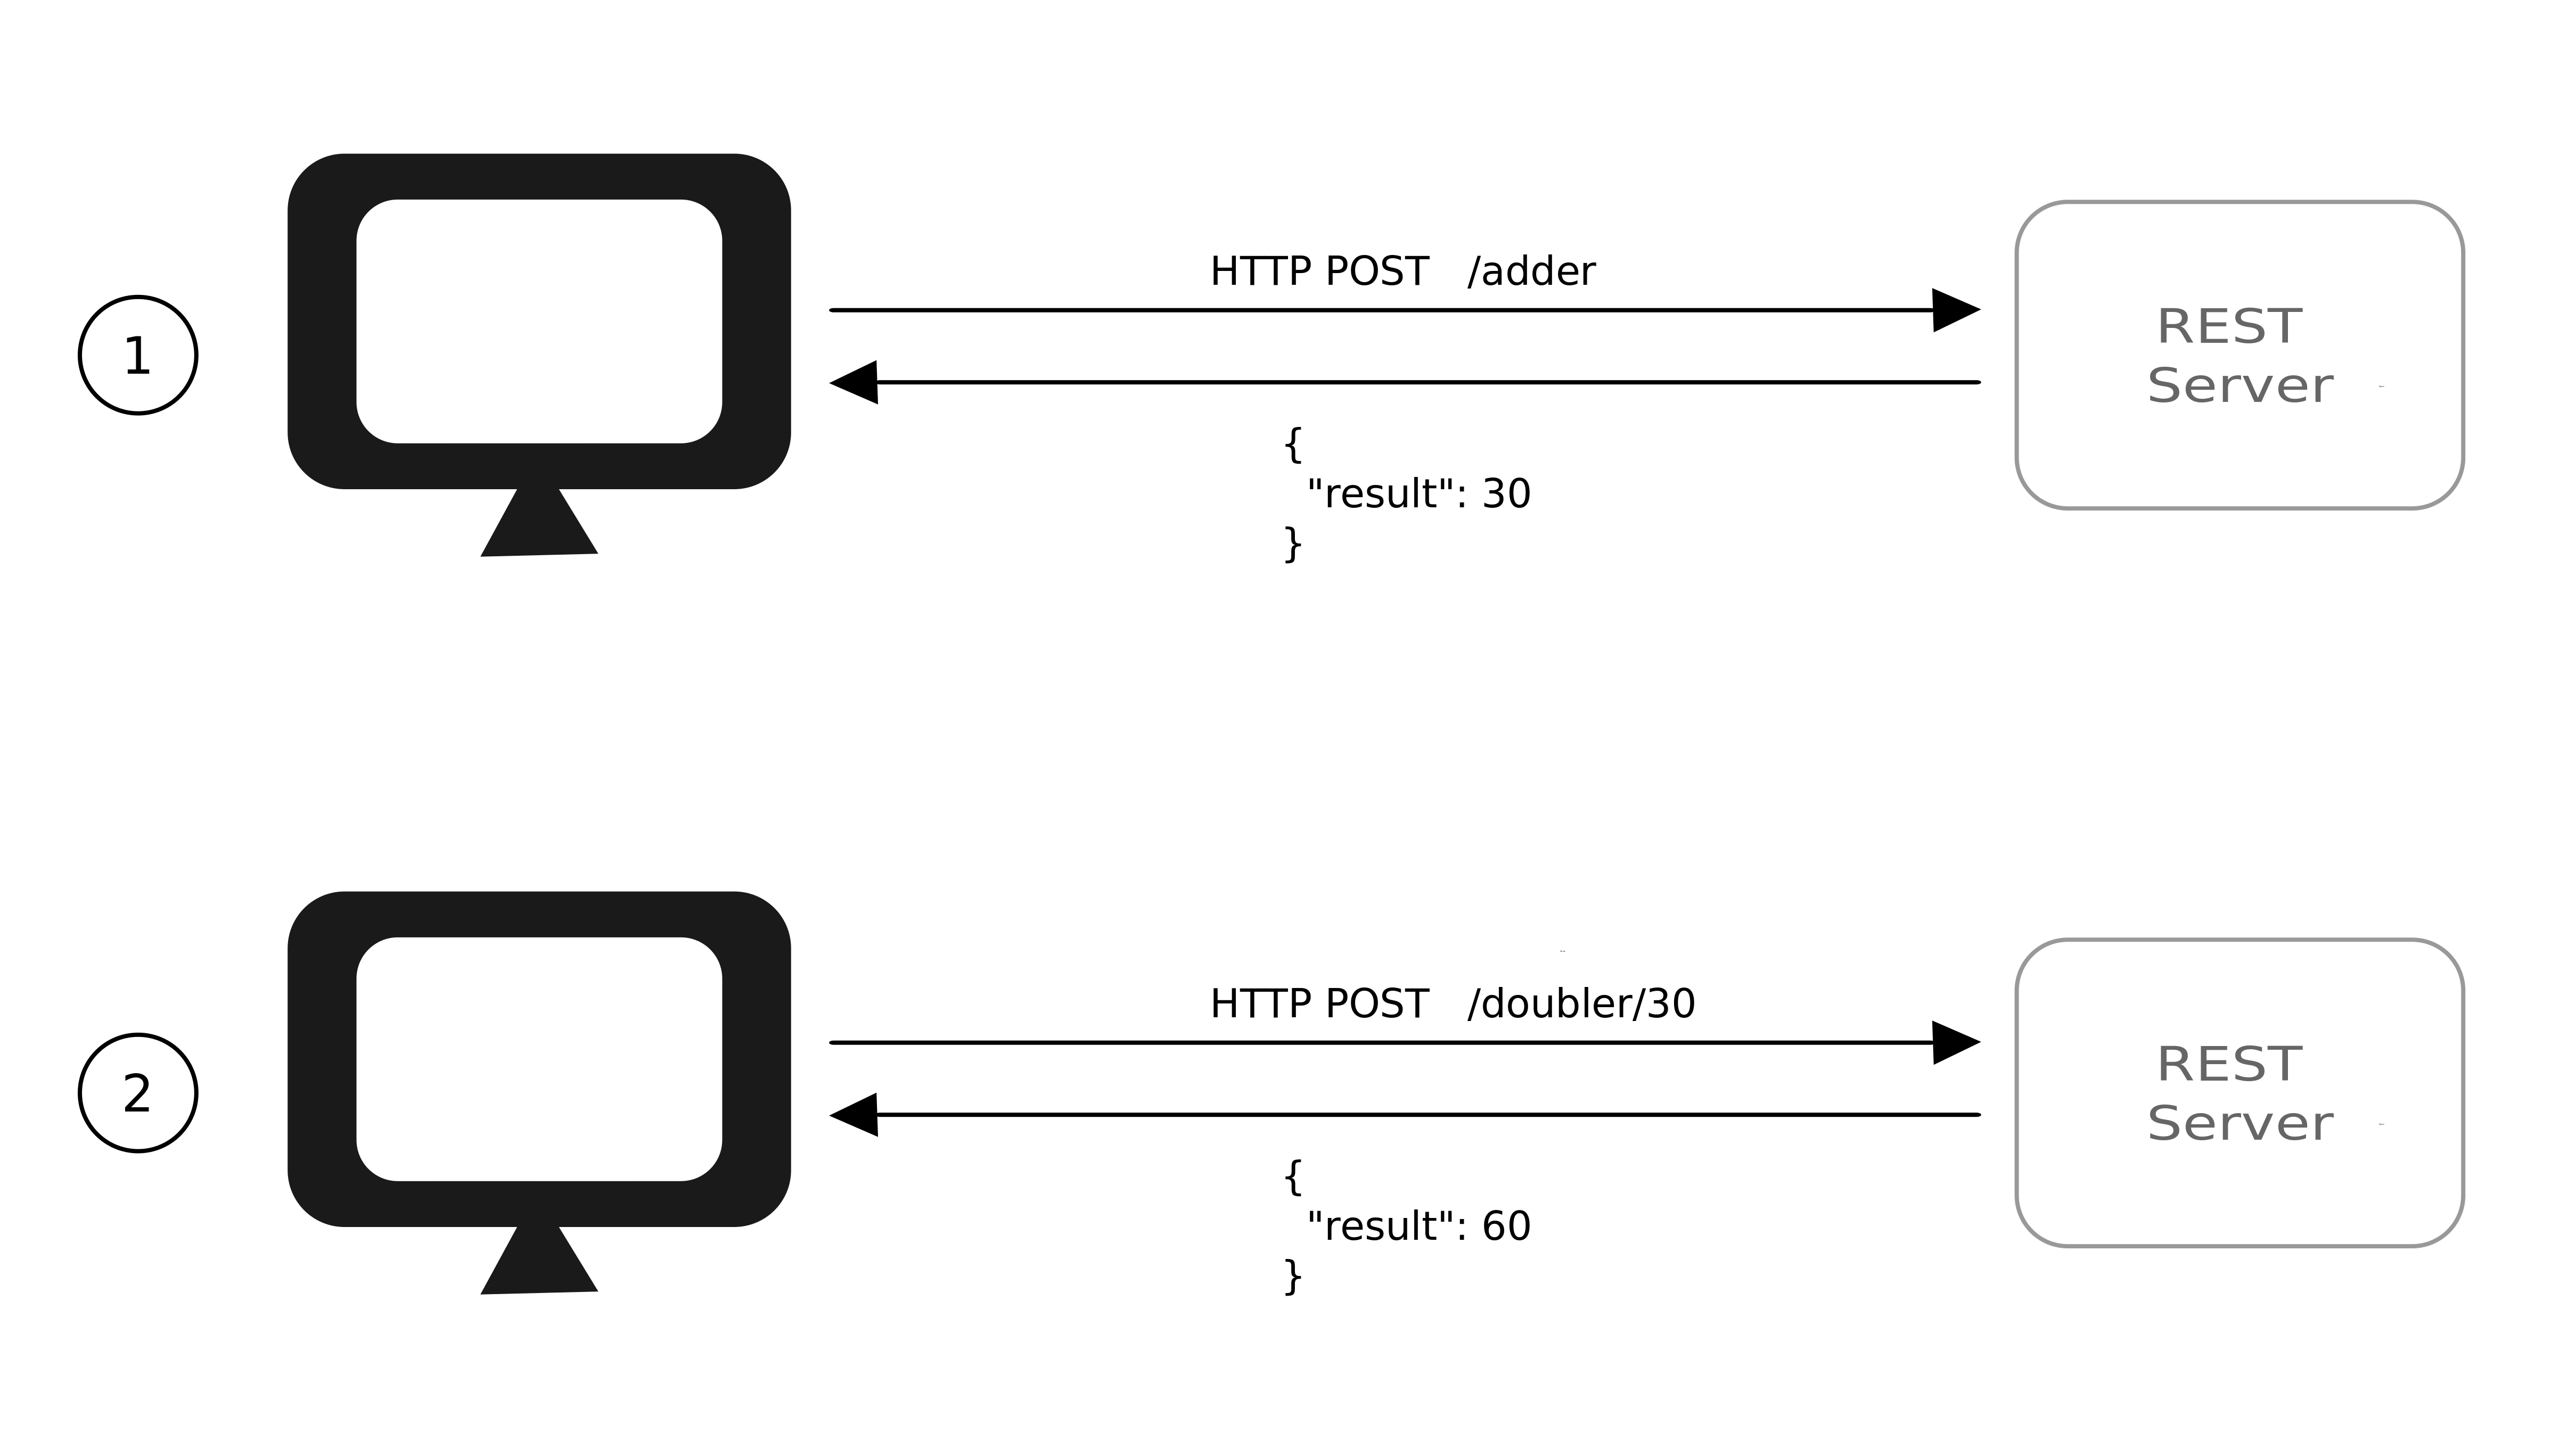
Notice, how we are making two requests from the frontend which means twice the roundtrip time. It leads to a slow response time and poor user experience.
The GraphQL way
Now if we switched the client from REST to GraphQL using Space Cloud, our requests will look like this:
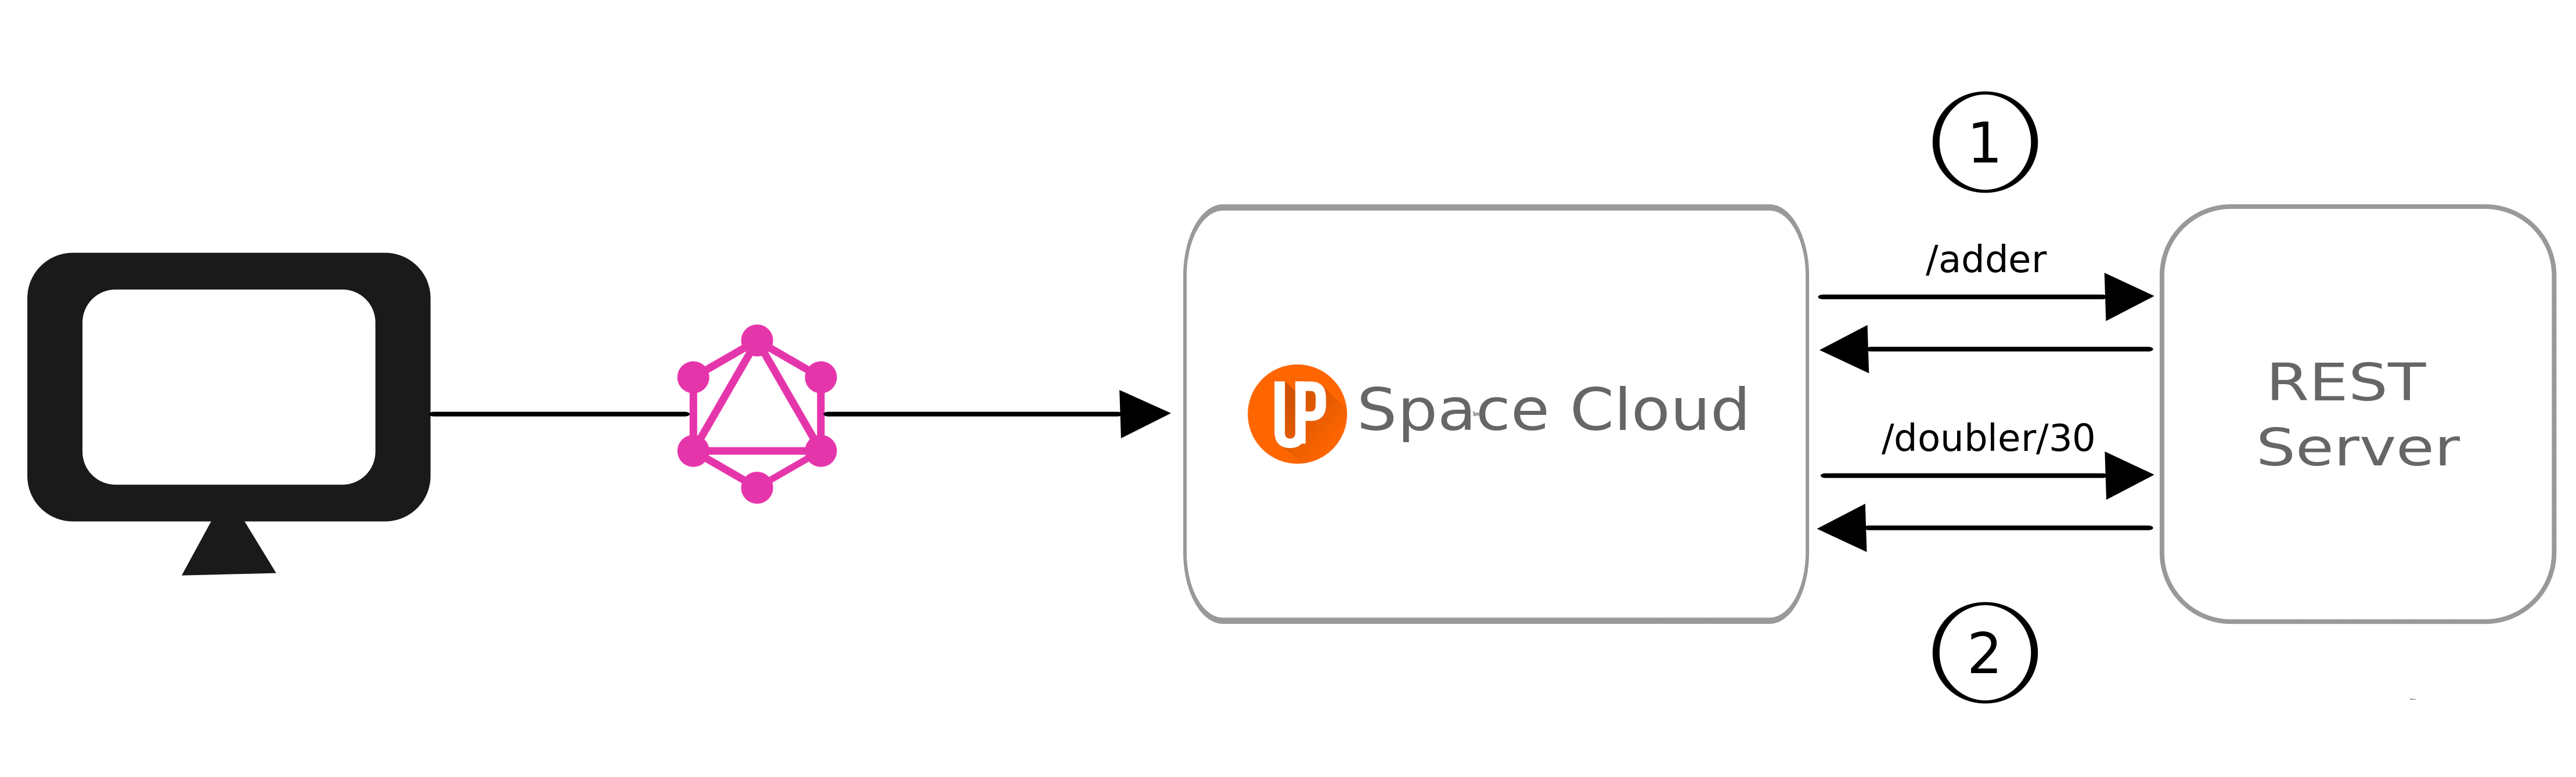
Notice, here we are making only one GraphQL query from the frontend to the backend (Space Cloud). Space Cloud, in turn, is making two requests to your REST server to fulfil this request. However, the round trips of these requests (from Space Cloud to your server) are negligible as they are in the same network.
The GraphQL query to Space Cloud to achieve the above task will be:
{
  adder(num1: 10, num2: 20) @myapp {
    doubler(num: "adder.value") @myapp {
      value
    }
  }
}
Notice, how we are calling the doubler service after the response of adder service and passing the result of adder service to the doubler as an argument.
The response for this query will look like this:
{
  "adder": {
    "doubler": {
      "value": 60
    }
  }
}
As you would have guessed we got 60 as a result ((10 + 20) * 2).
Additional tip: If you wanted to query two unrelated REST services parallelly, you could have done that too in a single request like this:
{
  adder(num1: 10, num2: 20) @myapp {
    value
  }
  doubler(num: 50) @myapp {
    value
  }
}
I will leave the response part of this query to you as an assignment😛.
Conclusion
First of all, give yourself a pat on the back for having followed this guide to the end.
We learned that:
- Migrating from REST to GraphQL doesn’t require code changes.
- We don’t need to choose between REST and GraphQL. We can support both REST and GraphQL together in the same application.
- Using GraphQL with Space Cloud provides us with some neat networking benefits and helps you reduce your round trips.
Well, there’s a lot more you can do with Space Cloud other than migrating from REST to GraphQL (eg: cross-database joins). Give Space Cloud a star on Github if you like it ❤️. Join our Discord server if you wanna bounce off some ideas or have any questions.